A stainless steel water bottle may leak because its lid is not fully closed, a sealing gasket is missing or incorrectly fitted, the closure components do not match, or part of the bottle has been damaged. Water can also escape through an open drinking spout or a lid that was never designed for sideways transport. The first step is to identify where the water appears before deciding what needs cleaning, adjustment or replacement.
For a bottle already in use, the investigation usually starts with the lid, sealing surfaces and removable components. For brands, importers and promotional product companies, the same problem raises additional questions: does the selected lid suit the intended application, are production components consistent, and were the finished bottles checked under appropriate conditions?
These questions matter because “leaking” describes a symptom rather than a single defect. Water running down from a cap can look like a problem at the bottle base. Residual water after washing can resemble a continuing leak. A bottle that remains dry while standing upright may behave differently when carried horizontally. An attractive sample does not establish how every closure configuration will perform.
The most useful approach combines practical troubleshooting with clear purchasing requirements. Buyers should understand the intended use of the complete bottle, including its lid and seals, rather than relying on the stainless steel body or a general “leak-proof” description.
This guide explains how to locate a leak, recognise common closure problems and review the checks that matter before placing a bulk order. It also distinguishes ordinary maintenance issues from damage that requires replacement or supplier investigation. For an existing branded bottle, follow the instructions supplied for that exact model; a procedure intended for one lid may not apply to another.
Identify Where the Water Is Coming From
Before replacing a gasket or rejecting a batch, establish the starting point of the water. Inspecting a wet bottle without first drying it can lead to the wrong conclusion because water travels along threads, down the body and beneath accessories.
Remove an external sleeve or silicone boot if the product instructions allow it. Dry the bottle, lid and accessible exterior surfaces. Then check the product using room-temperature water under conditions permitted for that model. Observe where moisture first appears rather than only where it eventually collects.
A photo of a wet base may show the result of leakage, but it does not necessarily identify its source. For a purchasing team handling a complaint remotely, a short video showing the dry bottle, closure and first appearance of water can be more informative.
| Where or when water appears | Possible explanation | First check |
|---|---|---|
| Around the lid-to-bottle connection | Incorrect closure, displaced seal, contamination or component mismatch | Lid alignment and accessible sealing surfaces |
| At a drinking spout | Spout not fully closed, damaged seal or unsuitable carrying position | Model-specific closure instructions |
| Around a vent opening | Vent design, valve condition or incorrect reassembly | Whether the opening has a specified removable valve |
| Immediately after cleaning | Residual water or a component fitted incorrectly | Drying and reassembly sequence |
| After fitting a replacement lid | Compatibility or dimensional mismatch | Exact lid and bottle identification |
| Around the bottle base | Water travelling from above, trapped external water or structural damage | Dry the whole exterior and locate the first wet point |
| Across the outside of a cold bottle | Condensation may be involved, depending on construction and conditions | Whether moisture forms broadly or emerges from a specific point |
These observations guide the investigation; they do not prove the cause on their own.
For bulk orders, record the model, capacity, lid version and batch alongside the symptom. If several customers report different-looking leaks, a shared component may still be involved. Conversely, similar wet areas can result from unrelated problems.
The objective is to describe the failure precisely enough that the buyer and supplier can reproduce it. “Water appears at the cap joint when the closed bottle is placed on its side” is more useful than “the bottle is bad.”
Gasket and Sealing Problems
Many bottle closures use a gasket to seal a connection between components. The gasket needs the correct shape, dimensions, material and installed position for the particular design. Its performance also depends on the surrounding parts applying the intended compression.
A gasket can look present while still being fitted incorrectly. It may be twisted, partly lifted from its groove or installed in the wrong orientation. Some seals have a shaped profile rather than a symmetrical round section, making orientation important.
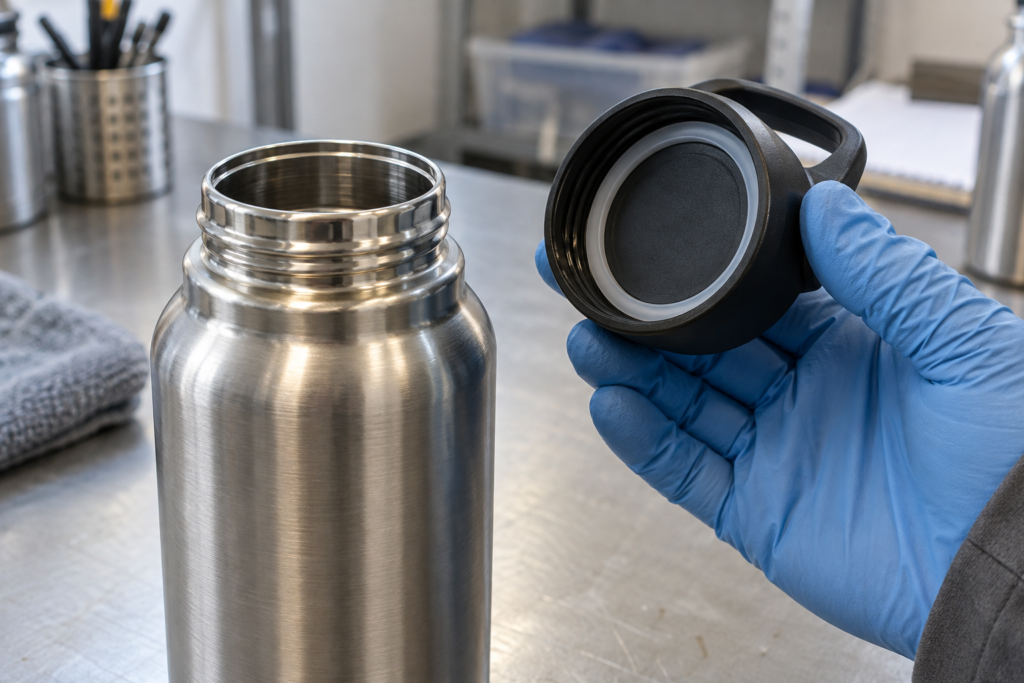
Check position before assuming the seal is worn out
If leakage begins after cleaning, review the reassembly instructions first. Check only the components identified as removable. Do not pry out a bonded or non-serviceable seal simply because another bottle uses a removable ring.
Inspect the accessible groove and sealing surface for residue or foreign material. Clean according to the product’s care instructions, rinse as directed and reinstall the component in its specified position. Avoid sharp tools that could cut the gasket or scratch a sealing surface.
Manufacturer instructions demonstrate why this must be model-specific: some lid designs require gasket tabs to align with particular features during reassembly. A general instruction to “put the ring back” can miss that detail.
Use a compatible replacement
A damaged gasket should be replaced with the correct part. Matching only the visible diameter is insufficient because thickness, cross-section and fit also influence sealing. A thicker ring is not automatically an improvement; it may prevent the lid from seating correctly.
Do not stack seals or use tape and adhesive to compensate for an unknown fit problem. Such changes can interfere with closure operation and introduce materials that were not specified for the product.
For private-label projects, retain the approved gasket specification and component reference. If replacement seals will be offered, confirm how customers can identify the correct version and install it.
Review recurring gasket complaints as a product issue
Repeated complaints should trigger a review beyond individual replacement. Check component consistency, installation, cleaning instructions and the ease of correct reassembly.
If users frequently install a seal incorrectly despite following the instructions, the design or guidance may need improvement. Collecting that information helps a brand reduce future complaints instead of treating every case as an isolated maintenance problem.
Lid Closure, Threads and Component Fit
A lid can appear closed without producing the intended seal. Cross-threading, debris, dimensional variation or damaged components may stop it from reaching the correct position. The resulting gap can allow water to escape even though the user feels resistance while turning the cap.
The goal is correct closure, not maximum force. Excessive tightening should not be used as a routine solution to uncertain fit. It can make the product difficult to open and may damage parts, depending on their design.
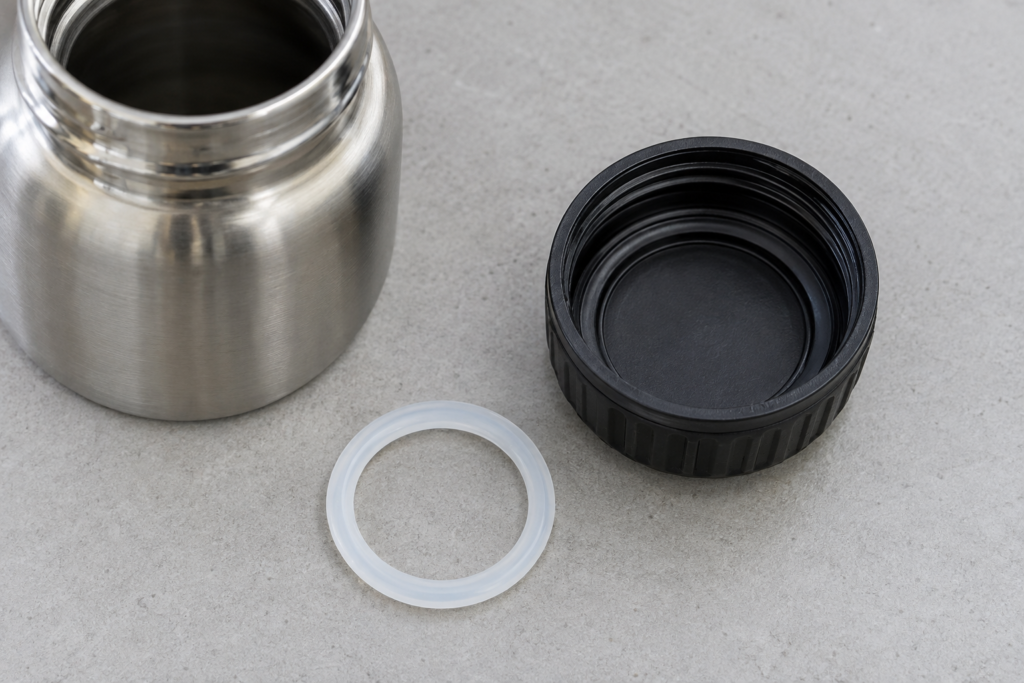
Look for alignment and abnormal resistance
Start the lid in the position described by the manufacturer and check that it engages evenly. A cap sitting at an angle or becoming unusually stiff immediately after engagement deserves further inspection.
Examine accessible threads and the bottle mouth for damage, distortion or trapped material. If the bottle has been dropped, the closure interface may have changed even when the body still looks usable.
For a new order, evaluate more than whether the lid screws on. Check how consistently it engages across samples, whether the closing action is understandable and whether users can recognise the fully closed position.
Do not assume interchangeable appearance means compatibility
Two lids may look almost identical yet use different thread geometry, sealing positions or dimensions. A replacement may attach to the bottle without producing a reliable seal.
Manufacturers publish compatibility guides for this reason. Bottle family and mouth design matter when selecting replacement caps; visual similarity is not an adequate substitute for confirmed compatibility.
For OEM purchasing, approve a specific bottle-and-lid combination. Where several lid options are offered, confirm each combination rather than testing one and applying the result to all of them.
Separate closure convenience from sealing performance
Easy opening, one-handed use and secure transport are different requirements. A closure can perform well in one area while needing improvement in another.
Buyers should describe the intended customer and carrying conditions before choosing a lid. A sports bottle used upright during training may have different priorities from a bottle carried beside documents in a work bag. Clear use requirements help the supplier propose a suitable closure and an appropriate sample evaluation.
Straw Lids, Flip Lids and Vent Openings
Different lid designs create different potential paths for water. A simple screw cap, a flip spout and a straw system should not be assessed as though they share the same structure.
A straw lid may include a drinking opening, a movable spout, seals and an air-management feature. A flip lid may rely on a plug or gasket engaging with a drinking aperture. Each design needs to be evaluated in its intended closed state.
Confirm what “closed” means for the selected lid
For some products, attaching the main lid is only part of the closing process. A spout, cover or lock may also need to be returned to its specified position.
Instructions should make these actions clear. If a user can easily leave the drinking opening partly open, the brand should consider both the product design and the clarity of the guidance.
There is also a difference between remaining sealed under a defined test and resisting accidental opening inside a bag. Some manufacturer guidance explicitly distinguishes a cap being leak-proof when closed from being suitable for packing where movement could open it.
Inspect vents without modifying them
An opening in a lid may be intentional. Do not block it with adhesive, enlarge it or remove a valve to stop a symptom without understanding its function.
Where a vent valve is designed to be removable, follow the specified cleaning and installation instructions. If the part is missing or damaged, obtain the correct replacement or replace the lid as advised.
For bulk buyers, request information about removable components and how they are retained. Small parts that are difficult to identify or reinstall can create avoidable after-sales problems.
Match beverage requirements to the complete product
The stainless steel body alone does not determine whether a particular lid is suitable for hot or carbonated drinks. Manufacturer restrictions vary by design; for example, specific straw-cap products expressly exclude these beverages.
Use the restrictions for the selected model in product descriptions and instructions. Avoid extending one configuration’s suitability to an entire range.
For a broader comparison of closure options, see our guide to insulated bottle lid types.
Water Around the Bottle Body or Base
Water at the bottom of a stainless steel bottle does not automatically mean the base is leaking. Moisture can travel from the lid, remain beneath an external boot or collect on the outside under particular conditions.
This distinction is especially useful when investigating customer photographs. A wet surface beneath a bottle shows where water collected, but a controlled observation is needed to determine where it originated.
Rule out external water first
Dry the exterior and any removable protective accessory. Check the upper body and cap connection before concentrating on the base.
If moisture reappears, observe whether it emerges from one specific location or develops across a wider area. Condensation is different from beverage escaping through a defect. However, appearance alone should not be used to dismiss a complaint or diagnose the insulation system.
Record whether the bottle was recently washed, filled or taken from a different temperature environment. These details can help the supplier interpret the observation without assuming a cause.
Distinguish liquid containment from vacuum insulation
A vacuum insulated bottle has an inner vessel and an outer shell. The beverage-containing structure and the sealed insulating space perform different functions.
A loss of insulation performance does not necessarily mean liquid will escape from the bottle. Likewise, a leaking lid does not demonstrate that the vacuum space has failed.
Our stainless steel water bottle manufacturing guide explains how these structures relate to the production process. For complaint handling, test and describe the two issues separately.
Refer suspected structural damage to the supplier
If water consistently emerges from a body joint or damaged area after external sources have been excluded, stop using the bottle and seek replacement or supplier assessment.
Do not attempt to restore a beverage container by drilling, soldering, welding or applying household sealants. Such repairs can affect the food-contact surface, insulation structure or other product characteristics.
For an importer, retain the affected sample and its batch information. Photographs are useful, but examination of the actual product may be needed to determine whether the issue concerns forming, joining, impact damage or another cause.
How to Check a Leaking Stainless Steel Water Bottle
A basic check should help locate the problem without introducing new damage or unsafe conditions. Use room-temperature water, work over a sink or tray, and follow the instructions for the exact bottle and lid.
This is a troubleshooting sequence, not a substitute for a production validation method. Do not use hot water, carbonation or improvised pressure equipment to make a suspected leak more visible.
Step 1: Identify the product and intended use
Confirm the bottle model, lid version and whether the manufacturer describes it as suitable for the intended carrying position. Check whether any components have been replaced.
If the product is designed for upright use only, sideways leakage may indicate unsuitable use rather than a failed component. That still matters commercially if the product was marketed for carrying inside a bag.
Step 2: Empty, clean and inspect accessible parts
Follow the cleaning instructions and inspect the bottle mouth, closure and permitted removable seals. Look for residue, missing components, visible damage or incorrect assembly.
Do not force apart a non-serviceable mechanism. If the condition of a component is uncertain, contact the supplier before continuing.
Step 3: Reassemble and dry the exterior
Install removable parts in the specified orientation and close the lid normally. Dry the outside thoroughly so that residual cleaning water does not confuse the result.
Keep a record of any adjustment. Changing several parts at once may stop the symptom but make its cause harder to identify.
Step 4: Observe under permitted conditions
Fill within the product’s stated limit and check for moisture in the allowed positions. Where sideways carrying is permitted, observe the relevant interfaces over a tray.
Do not treat one dry observation as proof of performance under every condition. A problem may depend on movement, repeated opening or a particular component combination.
Step 5: Record the result and next action
Note where water first appeared, the configuration and what had been changed. If leakage continues, use the manufacturer’s support or replacement process.
For brands handling repeated reports, a consistent checklist makes customer information more comparable and gives the factory a stronger basis for investigation.
How Bulk Buyers Should Evaluate Leak Resistance
For an OEM project, leak resistance should be defined before samples are approved. The question is not simply whether a bottle leaks, but whether the complete configuration meets the intended use requirements.
Start with the application: gym use, school bags, commuting, retail sales or promotional distribution. Then identify the beverage, carrying position, opening method and cleaning expectations.
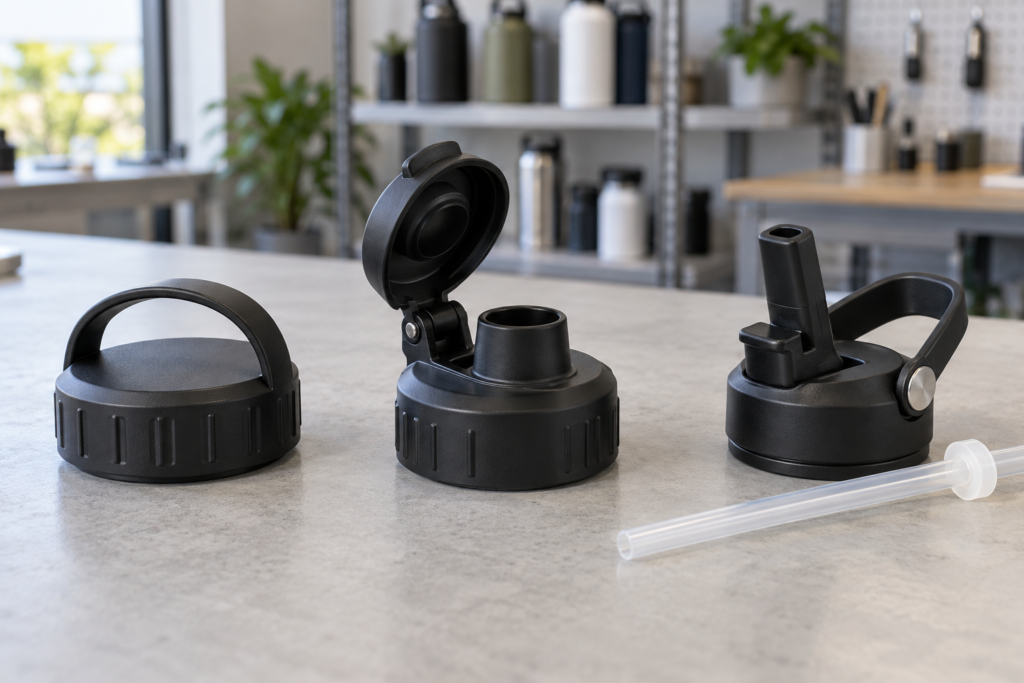
Select the lid around the application
| Lid configuration | Purchasing considerations | What to verify on the sample |
|---|---|---|
| Full screw cap | Closure effort, gasket access and transport requirements | Correct engagement and sealing under agreed conditions |
| Screw-on chug lid | Main cap connection and separate drinking closure | Both interfaces and any retaining features |
| Flip drinking lid | Closure feedback, latch operation and cleaning access | Fully closed state and resistance to unintended opening |
| Folding straw lid | Spout position, vent components and beverage restrictions | Relevant seals and suitability for the intended carrying method |
| Open-straw tumbler lid | Upright drinking and movement between locations | Actual spill resistance; do not assume sealed bag transport |
| Bottle supplied with multiple lids | Different uses and component combinations | Each approved bottle-and-lid configuration |
These categories support selection; they are not universal performance ratings. Two lids in the same category can have different construction and use restrictions.
Approve a complete configuration
A sample approval should identify the bottle body, lid, seals, accessories and any relevant revision. Record the test conditions and the result alongside the appearance approval.
If the project includes several sizes, determine which combinations need evaluation. A shared design concept does not remove the need to confirm fit and function.
Also consider repeated use. Depending on the project, validation may include opening and closing cycles, cleaning exposure or other agreed conditioning before the leak assessment. The method should reflect the intended product claim.
Keep the claim consistent with the evidence
Packaging, sales pages and instructions should describe the performance that was actually evaluated. Terms such as “spill-resistant” and “leak-proof” should not be switched casually between marketing materials.
If the lid must be locked or the spout folded down, that condition belongs in the instructions. If the product is not suitable for a particular beverage or transport situation, communicate that clearly.
For model selection, review our sports water bottle options and include the required carrying conditions in your enquiry. This helps connect the recommended product to the intended application.
Set a Clear Leak-Test and Inspection Plan
A useful test plan defines what will be evaluated, how it will be evaluated and what counts as an acceptable result. Without those details, two suppliers can both report that a product “passed a leak test” while using different procedures.
The plan should distinguish product validation from routine production inspection. Validation examines whether the design meets the intended requirements. Production checks examine whether manufactured goods remain consistent with the approved specification.
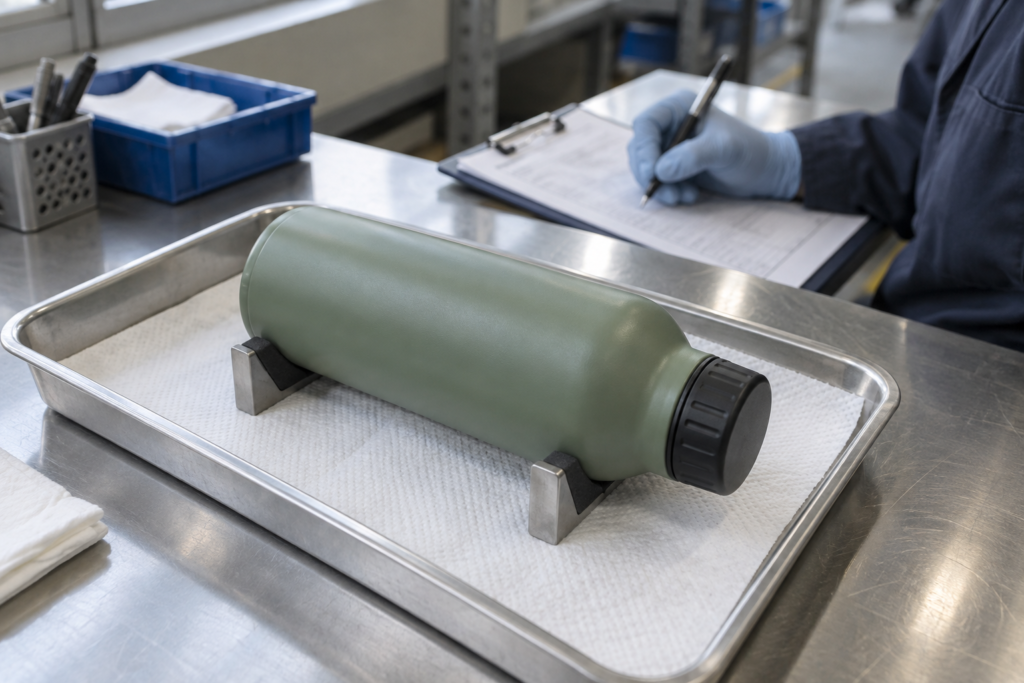
Agree the conditions before production
| Test-plan item | What to specify | Why it matters |
|---|---|---|
| Product identification | Model, capacity, lid and gasket version | Connects the result to the supplied configuration |
| Test liquid | Defined medium appropriate to the method | Supports repeatable comparisons |
| Fill condition | Agreed volume or fill level | Avoids inconsistent preparation |
| Temperature | Relevant liquid and environmental conditions | Makes the conditions clear |
| Closure preparation | Normal closing method and required lock or spout position | Defines the state being assessed |
| Orientation | Upright, horizontal or other specified position | Matches the intended use |
| Duration | Agreed observation period | Makes results comparable |
| Movement or conditioning | Any relevant handling, cycling or cleaning procedure | Evaluates requirements beyond a static check |
| Acceptance criteria | Defined visible leakage or other measurable limits | Prevents subjective pass/fail decisions |
| Inspection scope | Validation samples, routine checks or batch sampling | Clarifies what the result represents |
| Records | Batch reference, date, operator and outcome | Supports follow-up and traceability |
There is no single test duration in this guide that should be copied into every project. The method must suit the construction, intended use and agreed requirements.
Distinguish different kinds of testing
A liquid leakage check, a thermal performance test and an assessment of the vacuum structure answer different questions. Passing one should not be presented as proof of all three.
Factories may also use different equipment or screening methods at different stages. Ask what each method detects and how it relates to finished-product acceptance.
For additional planning, review our stainless steel water bottle inspection guide.
Define what happens after a failure
The plan should include segregation, investigation, corrective action and reinspection where appropriate. A failed sample should trigger a defined response rather than being replaced quietly by a passing unit.
For sampling inspections, record the applicable plan and defect classifications. The absence of defects in an inspected sample does not mean every unit was individually tested. Reports should accurately describe the scope of the work performed.
Reducing Leakage Complaints in Bulk Orders
Reducing complaints requires consistency across design, components, assembly, inspection and customer guidance. A bottle may perform well during initial approval but produce problems later if a component changes or assembly instructions are unclear.
For brands and importers, the objective is to make the approved result repeatable and to detect changes before products reach customers.
Control components and revisions
Maintain an approved component list for each SKU. This should identify the bottle, lid, seals and accessories that affect function.
A supplier change or material adjustment should be reviewed where it could influence fit or performance. Even a small modification to a gasket profile or lid feature may require renewed evaluation.
For products offered with interchangeable lids, maintain a compatibility record. This reduces the chance of packing a visually similar but unapproved combination.
Make assembly requirements visible
Assembly instructions should identify the correct parts, orientation and checks. Inspection should address missing seals, incorrect installation and closure operation as applicable.
Where a problem repeatedly appears, investigate whether the process allows it to occur easily. Additional inspection can detect defects, but clearer component identification or an assembly improvement may help prevent them.
Collect useful after-sales information
A complaint record should include the model, purchase or batch reference, leakage location, carrying conditions and any recent cleaning or replacement parts.
Ask for a short description or video rather than assuming misuse or manufacturing failure. Compare complaint numbers with the number of units supplied and review patterns by model or batch. A few isolated reports and a repeated failure across one batch require different responses.
Make corrective action specific
Once a cause is supported by evidence, define the change and how it will be checked. Possible actions include correcting assembly, revising instructions, replacing an unsuitable component or reviewing a design feature.
Record which batches or revisions are affected. For repeat orders, confirm that the approved change is included rather than relying on an informal message from an earlier project.
Clear records help the buyer and factory resolve the current issue and reduce the likelihood of the same problem returning.
Common Mistakes When Sourcing Leak-Resistant Bottles
A low quotation or an attractive sample can distract buyers from the closure details that determine everyday performance. The following mistakes are worth addressing during supplier comparison and sampling.
Approving appearance without checking function
Colour, printing and packaging are important, but they do not demonstrate sealing performance. Evaluate the complete product under agreed conditions before approving functional claims.
Keep artwork approval separate from product validation so that a digital mockup is not mistaken for a fully approved sample.
Assuming every straw lid is suitable for bag transport
A straw mechanism may have additional openings or movable parts. Confirm the exact closure state and intended carrying method.
Do not generalise from another brand or another lid that looks similar. Product-specific evidence is more useful than a category label.
Replacing parts without reviewing compatibility
Changing the lid or gasket can affect the approved configuration. Obtain confirmation of compatibility and repeat the relevant evaluation when needed.
For spare-part programmes, label replacement parts clearly so customers can select the correct version.
Relying on one successful demonstration
A supplier showing one bottle upside down does not establish batch consistency, durability or every intended use condition.
Ask for the test method, inspection scope and relevant records. The level of evidence should reflect the project’s requirements.
Treating stronger tightening as the solution
If normal closure does not provide the intended seal, investigate the interface and components. Requiring excessive force may create usability problems and conceal an underlying mismatch.
Leaving instructions until the packaging deadline
Cleaning, reassembly and closing instructions should be developed alongside the product. They should match the approved lid and removable parts.
Review them with the physical sample. A drawing that shows the wrong seal orientation can undermine an otherwise suitable product.
Frequently Asked Questions
Why does my stainless steel water bottle leak even when closed?
The lid may appear closed while a gasket is displaced, damaged or contaminated, or the closure may not be engaging correctly. An open drinking feature or an incompatible replacement part can also be involved. Dry the exterior, identify where water first appears and follow the model-specific inspection instructions.
How do I check whether the lid gasket is fitted correctly?
Refer to the assembly instructions for the exact lid. Check that the seal is the correct part and sits in the specified position without twisting or protruding. Some seals have a required orientation. Remove only parts designated as removable, and avoid using sharp tools to force a seal into place.
Why does my bottle leak after cleaning?
A removable seal or valve may have been installed incorrectly, or water may remain in an external area and appear later. Check the permitted reassembly steps and dry the exterior before testing. If a component is damaged or cannot be reinstalled correctly, seek the appropriate replacement.
Can a straw-lid bottle be carried inside a bag?
That depends on the specific product. Some designs seal when fully closed, while others are intended for upright use or may open unintentionally during movement. Confirm the manufacturer’s carrying instructions rather than assuming all straw lids are suitable. For OEM orders, include bag transport in the requirements if customers will expect it.
Why is there water around the bottom of my bottle?
Water may have travelled down from the lid, remained beneath a protective boot or formed externally under particular conditions. A structural leak is another possibility. Dry the bottle and accessories, then identify where moisture first appears. Persistent water emerging from the body or a joint requires supplier assessment.
Does losing vacuum insulation mean the bottle will leak?
Not necessarily. The insulating space and the beverage-containing structure perform different functions. A bottle can lose thermal performance without liquid escaping, while a lid can leak on a bottle whose insulation remains effective. Describe and evaluate thermal performance and liquid leakage separately.
Can I use a replacement lid or gasket from another bottle?
Only use a part confirmed as compatible with the exact model. Similar appearance or the ability to screw on does not prove that the sealing surfaces match. For a private-label range, retain component references and compatibility information so that replacement parts can be selected correctly.
How should brands test bottles before placing a bulk order?
Approve the complete bottle-and-lid configuration and agree a test plan covering preparation, closure state, orientation, duration and acceptance criteria. Add relevant use or cleaning conditions where needed. Review samples and records, then establish how production inspection will verify consistency with the approved product.
Choosing Bottles That Match the Intended Use
A leaking stainless steel water bottle should be investigated by locating the source, checking the approved closure configuration and separating maintenance issues from damage or design limitations. This approach is more useful than immediately replacing a random seal or assuming the bottle body is defective.
For bulk purchasing, the same principles apply at a larger scale. Define the intended beverage and carrying conditions, select a suitable lid, approve compatible components and establish clear inspection requirements. Keep marketing claims and customer instructions consistent with the performance that has been evaluated.
Reliable purchasing decisions depend on the complete product. The body, closure, seals and user instructions all contribute to the result. Reviewing them together helps brands and importers reduce avoidable complaints and build a more consistent product range.
Discuss Your Bottle and Lid Requirements with ShinyStar Flask
ShinyStar Flask supports custom stainless steel water bottle projects with model selection, lid options, colour and logo customisation, and packaging.
Send us your preferred bottle image or style, capacity, order quantity and destination market. Let us know whether the product is intended for upright use, sports activities or carrying inside a bag, together with any testing requirements.
We can recommend suitable configurations and provide a quotation and sample proposal for your review.